How to Setup PostgreSQL for Rails and Heroku
Install PostgreSQL Locally
Ryan Bates has already put together a wonderful Railscast on this topic so feel free to jump over there to view it. My main goal in writing this post was to distill down what he said, point out a small gotcha along the way and offer some additional tools.
There are a few different options for installing PostgreSQL. The first one, which Ryan outlines, is to use Homebrew and simply do a brew install postgresql. Some folks might not be comfortable with that process so I wanted to also recommend the new PostgreSQL.app from the team at Heroku. If you’re more used to tools like MAMP then the PostgreSQL.app might be a bit more your style.
If you go the Homebrew route make sure you type in initdb /usr/local/var/postgres after the install finishes to init your first database. The installer will also mention some commands you can use to have PostgreSQL auto-start whenever you turn on your computer. I wasn’t a big fan of this approach so instead I created two aliases in my .bash_profile.
alias pg-start='pg_ctl -D /usr/local/var/postgres -l /usr/local/var/postgres/server.log start'
alias pg-stop='pg_ctl -D /usr/local/var/postgres stop -s -m fast'
With these I can just type pg-start to fire up Postgres and pg-stop when I want to shut it down.
Change Rails Database to PostgreSQL
The next thing you’ll want to do is either convert an existing project to PostgreSQL or create a new rails project and set PostgreSQL as the database.
Creating a new rails project for Postgres is as easy as rails new blog -d postgresql. After running this command you’ll also need to call rake db:create:all to create a new database.
To convert an existing project you’ll want to update your Gemfile to include the pg gem. A basic Gemfile might look something like this:
source 'https://rubygems.org'

gem 'rails', '3.2.3'
gem 'pg', '~>0.13.2'

group :assets do
  gem 'sass-rails',   '~> 3.2.3'
  gem 'coffee-rails', '~> 3.2.1'
  gem 'uglifier', '>= 1.0.3'
end

gem 'jquery-rails'
You’ll also need to update your config/database.yml to look for Postgres instead of SQLite or MySQL.
development:
  adapter: postgresql
  encoding: unicode
  database: [insert your dev database name]
  pool: 5
  username: [insert your user name]
  password:

test:
  adapter: postgresql
  encoding: unicode
  database: [insert your test database name]
  pool: 5
  username: [insert your user name]
  password:
Since we haven’t created any Postgres user accounts both Homebrew and PostgreSQL.app will simply use our current username as the login. The password can remain blank. After this is done you’ll also need to call rake db:create:all to create the new database.
Connect a Rails Project to a PostgreSQL Database on Heroku
If your project isn’t already under version control then now would be a good time to set that up.
git init
git add .
git commit -m 'Initial commit!'
Next we’ll create a free Heroku instance
heroku create --stack cedar
After that’s done we’ll simply push our project up there.
git push heroku master
You might see some deprecation warnings about vendor plugins. For now you can (probably) safely ignore those.
Here’s one little gotcha that I seemed to run into. If you try to access your site on Heroku using the heroku open command you might get an error page. You have to make sure to also call heroku run rake db:create:all otherwise your production database will not be in place and your app will fail to connect to it. Speaking of production databases, you should also note that Heroku will overwrite whatever you put into your config/database.yml so you don’t have to worry about figuring out all the connection details for their shared services…it’ll all just work. Sweet!
PostgreSQL GUI
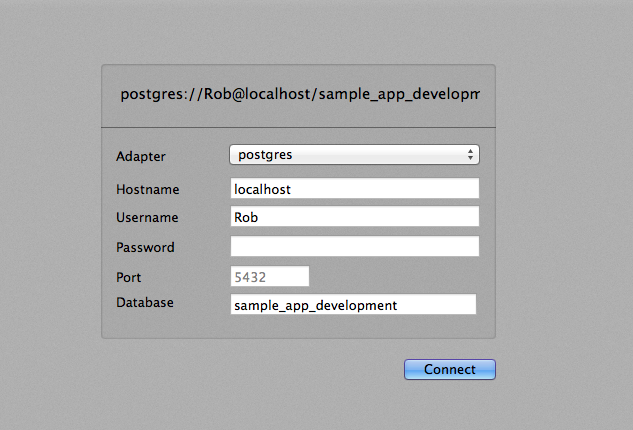
One last tip re: your new Postgres setup. If you’re just starting out like me then your command line fu is probably not as strong as you’d like it to be. Personally I really like having a nice GUI to visualize the tables in my database. For MySQL I usually use the awesome (and free) SequelPro. For PostgreSQL you can use Induction. It doesn’t seem like they have a downloadable binary on their website (weird?) but you can grab one out of the Github repo’s downloads page. Connecting to your Postgres instance can be a little tricky, you have to make sure to use the PostgreSQL adapter, localhost as the hostname, your computer’s username as the user and the password can remain blank. You also HAVE to give it a database name (even though it says it’s optional) or it will throw a FATAL: database [your username] does not exist. Here’s a screenshot of what mine looks like:

You should follow me on Twitter here.